How to Search and Register for Classes
KnightVision Self-Service – accessible through the mySMC portal – has the most complete and up-to-date course information available! Learn more about how to use KnightVision Self Service to browse the available courses and their descriptions, add courses to your schedule, and then register for the current term.
Click through the steps below for instructions about how to search for classes in Self Service.
To access Self Service, log into your mySMC portal and select the KnightVision Self Service link. Use your MikeNet credentials to log in to Self Service (note: make sure to type your username with all lowercase letters).

On the Self Service home page, select ‘Schedule of Courses’ to view and search for the available course offerings.

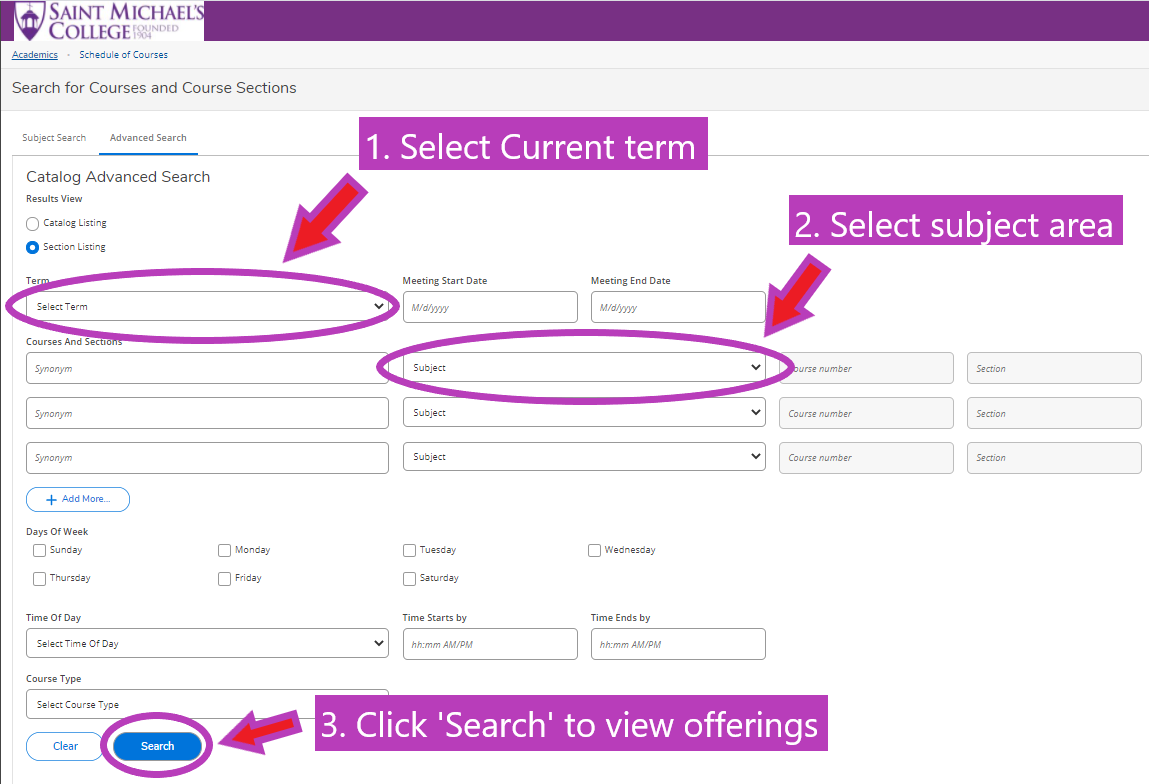
In the Advanced Search tab, select the current term and choose the subject area from the dropdown menus. Then click ‘Search’ to view the results.
(Note: You are only required to pick a term and subject, but if you are looking for a specific course you can enter in additional details at this stage.)
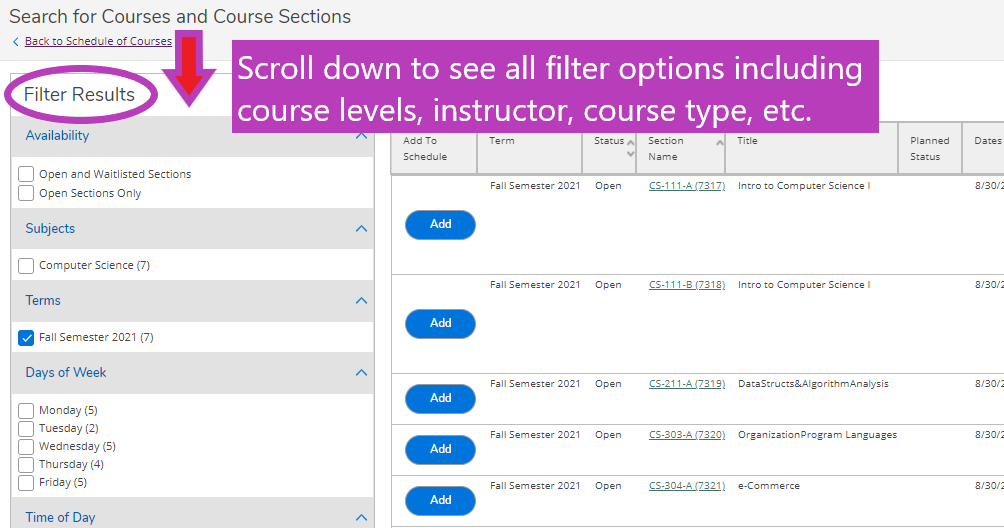
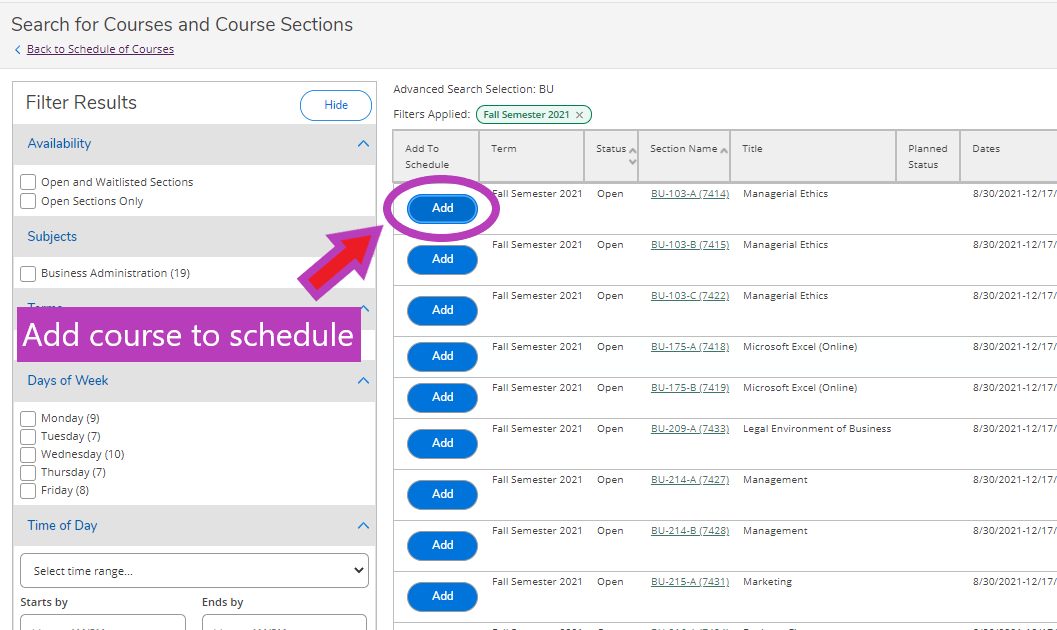
View your results. A list of the courses being offered will show here. If you wish to narrow down the list further, you can use the ‘Filter Results‘ toolbox on the left side of the page.
(Note: There may be multiple pages of results. Make sure to scroll to the bottom and explore all pages.)
For more details about a course (including restrictions & prerequisites, instructor contact information, etc.) click on the course number link.
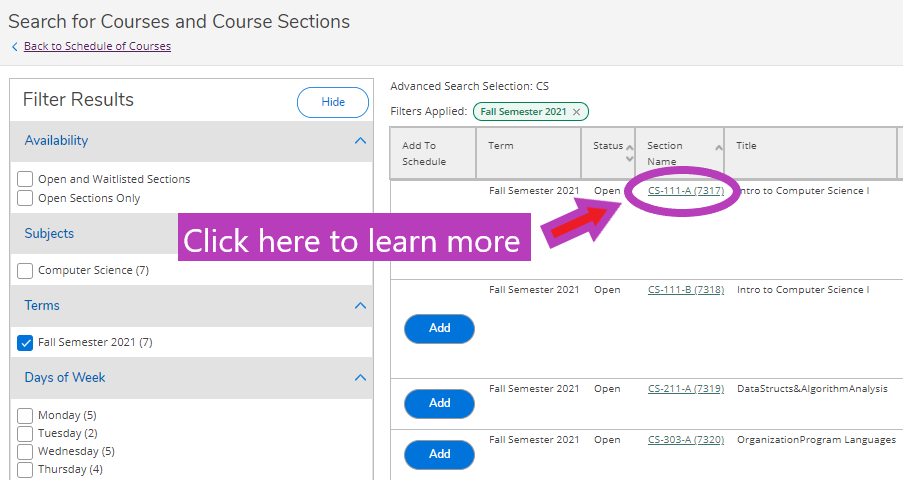
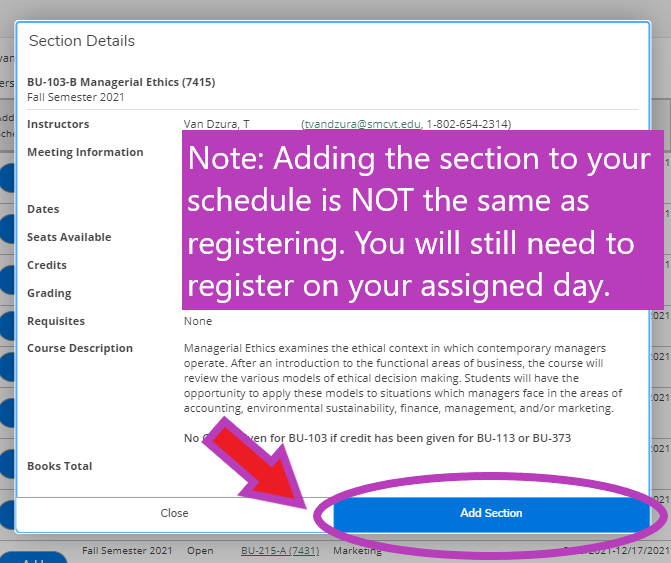
To add the course to your schedule, click on the ‘Add’ button, review the details and then click ‘Add Section’.
(NOTE: Adding a course to your schedule is NOT the same as registering for the course – you will still need to log in during your registration period to register for courses using the instructions below.)
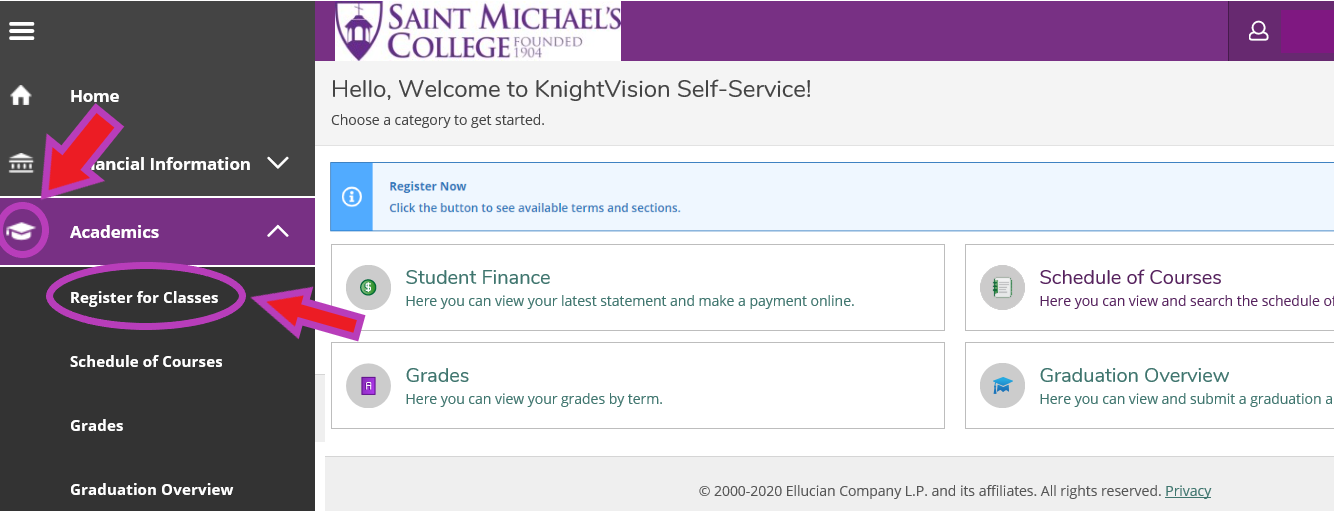
To view a summary of your selections, go to the home page of Self Service, click on the grad cap image in the left hand tool bar (the Academics section), and then click ‘Register for Classes’.
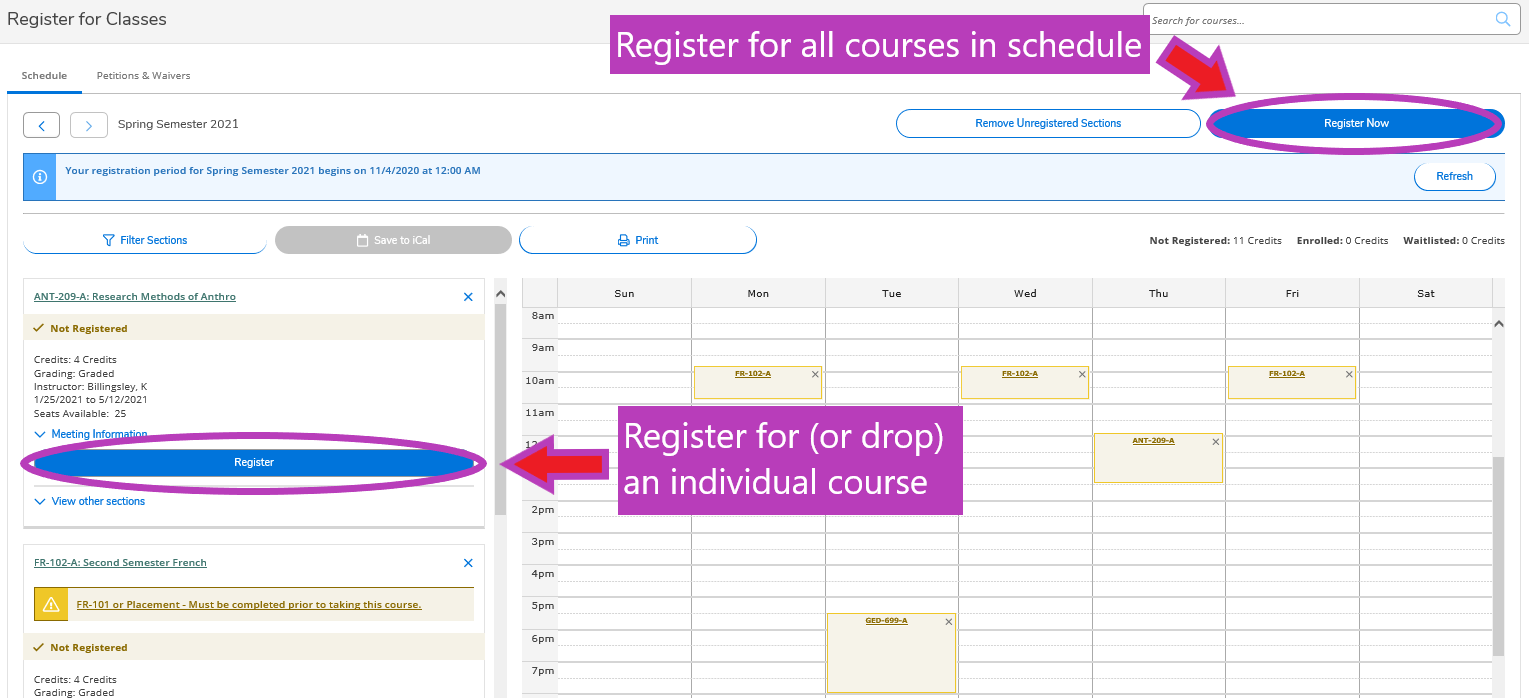
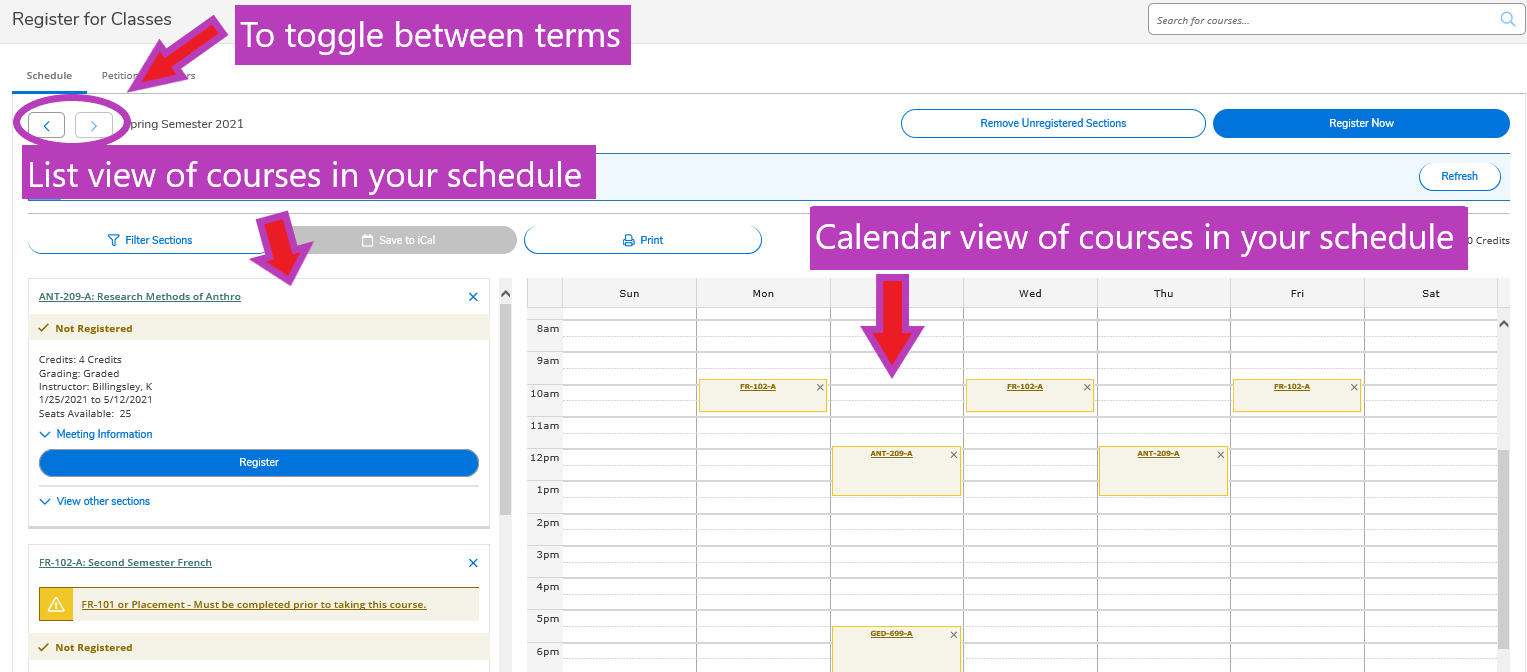
Use the arrows at the top of the page to navigate to the current term. Your selected course schedule for the term will be listed below. You will see the list view of pre-selected courses with more details on left side and the schedule calendar view on the right side.
To print a copy of your schedule for the selected term, click on the ‘Print’ button. This will direct you to a page with a summary of your planned schedule.
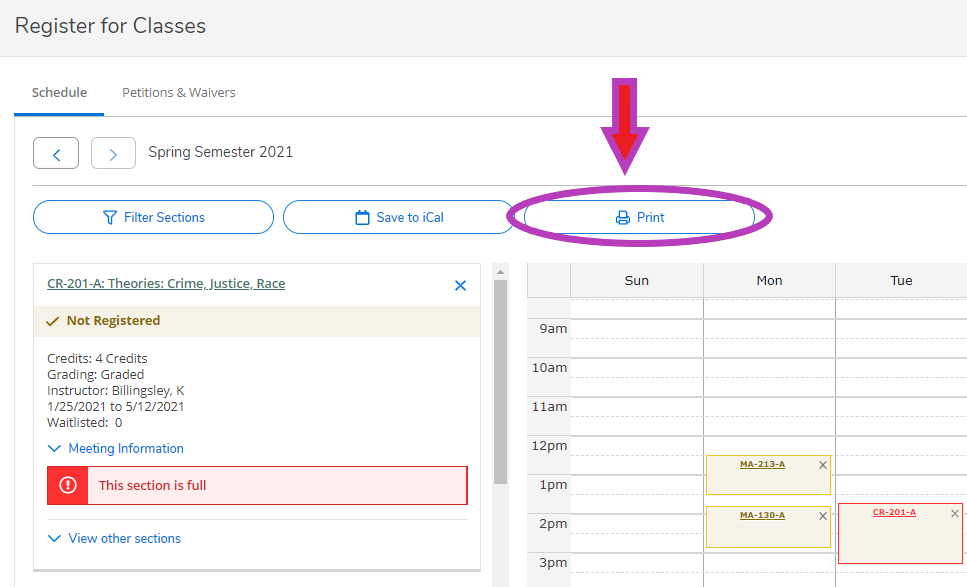
Here, you can print or download the schedule for reference.

Click through the steps below for instructions on how to Register for Classes in Self Service.
During your group’s assigned registration period (course registration schedule), log in to KnightVision Self Service using your MikeNet credentials.

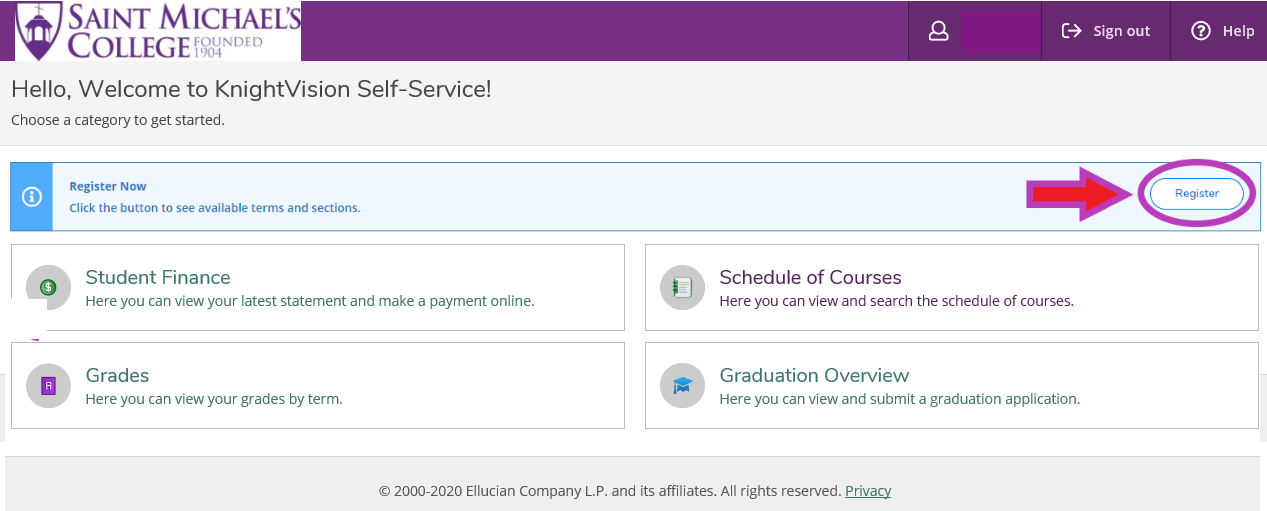
If you’ve already confirmed that your course schedule is correct prior to your registration period, you may choose to use the ‘Register‘ button in ribbon at the top of the page to quickly register for all pre-selected courses.
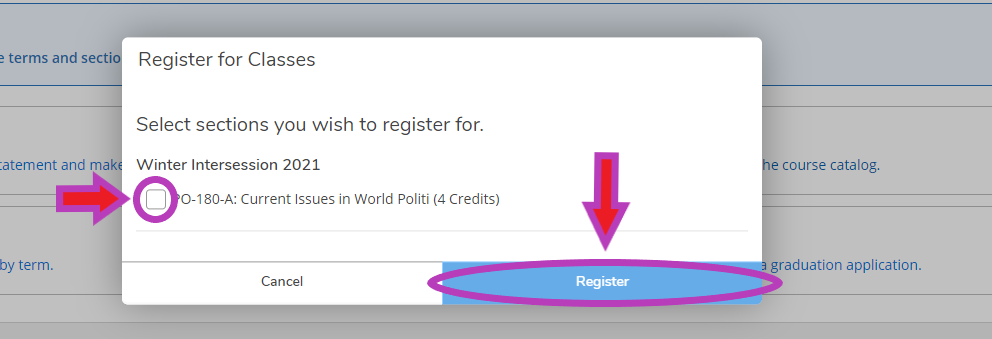
A list of the courses that you have in your schedule will pop up. Select the courses that you wish to register for, and then click ‘Register’.
If you need to first review your schedule of courses, click on the grad cap image in the left hand tool bar (the Academics Section), and then click ‘Register for Classes’.
Use the arrows at the top of the page to navigate to the current term. Your selected course schedule for the term will be listed below. You will see the list view of pre-selected courses with more details on left side and the schedule calendar view on the right side.
Once you’ve reviewed your course schedule and are satisfied with your selections, use the ‘Register Now’ button at the top of the page to register for all preselected courses.
You can also use the ‘Register’ button to register for each individual course separately. If you registered for a course by accident, you can use the ‘Drop’ button to unenroll.